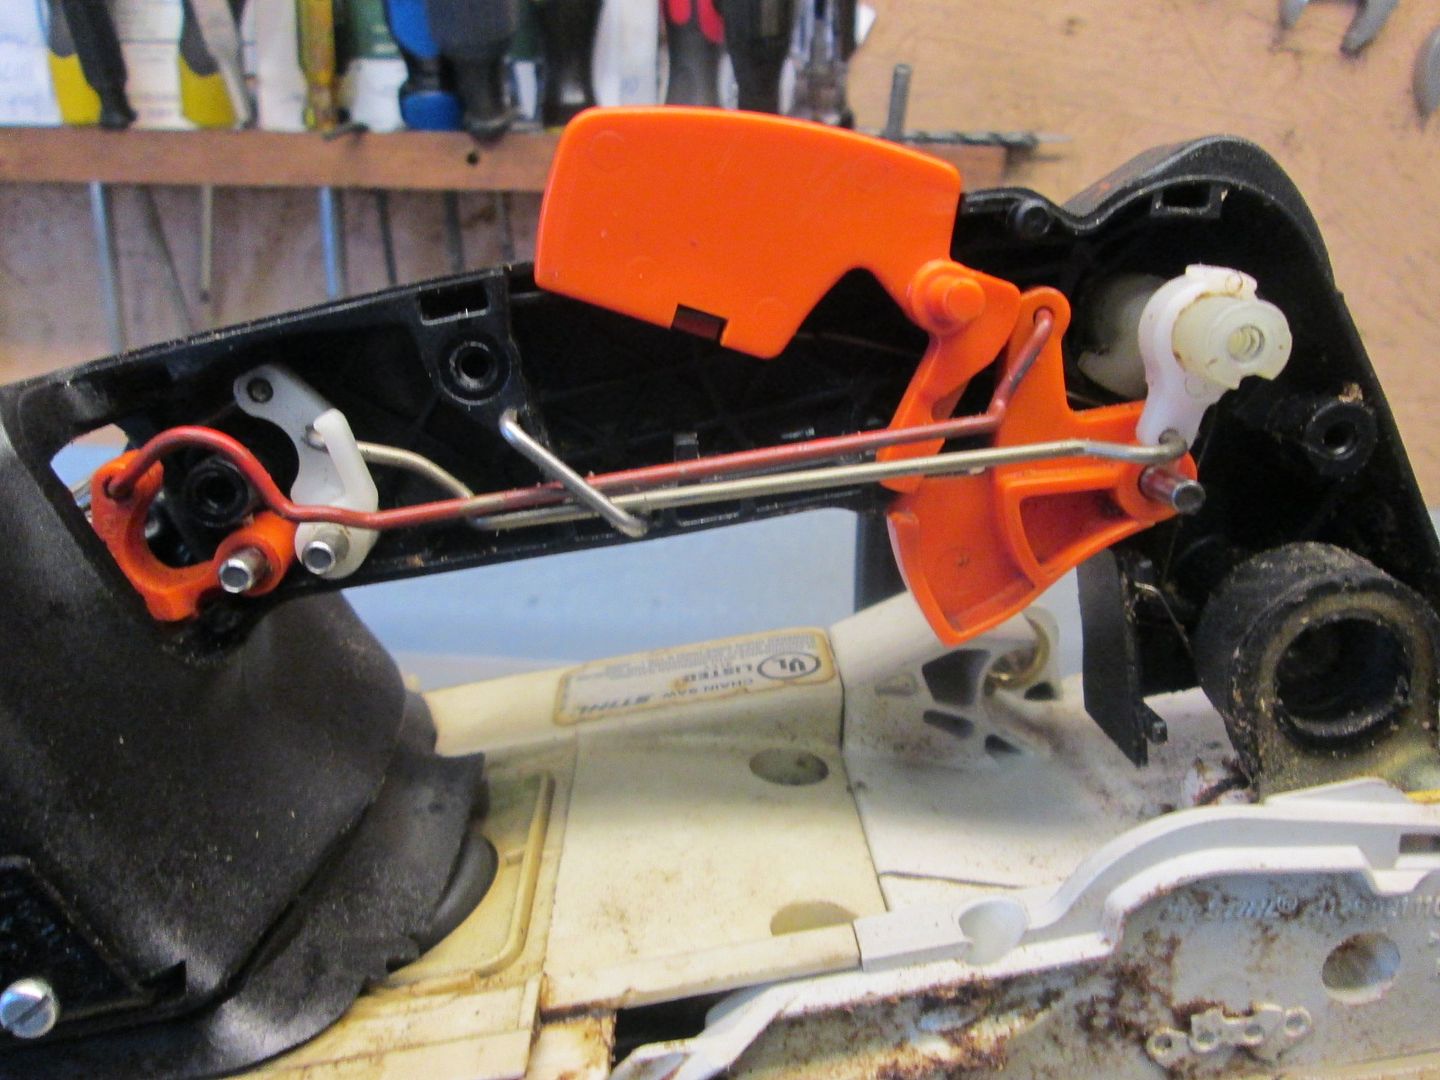
200T handle re-assemble need diagram

Bermy

Acolyte of the short bar
Joined
May 3, 2008
Messages
8,626
Location
Tasmania
Help, I need the page from the manual that shows putting back all the handle guts in a 200t.

I've had to take it all apart to replace my tank vent, and best laid plans of keeping it all relatively intact went down the drain. It's been a while since I did a handle and there is no way I'm going to get it all right in under a week without a diagram!

Email is treecare@northrock.bm

PS: I managed to nick the edge of the thin orange valve type thing inside the tank...I have a suspicion its not going to seal properly now...what do you think? Is that a replaceable part?

Thanks guys 8)
 
I confess I too long to understand the reverse assembly. 10 minutes ... :) Orange traction going as usual.
White traction going in the closed position the choke ...
Germans are great engineers and mechanics. Each item has a graceful curve and functionality. Especially in the 200t ...
 
I've had trouble with those insides a time or 2 myself. Somebody must have stayed up real, real late creating the spaghetti that is the inside of a 200 handle.
 
  • Thread Starter Thread Starter
  • #8
Thanks guys!

Randy, do you have a photo with the electric bits attached and/or the linkages going to the carb? Although I should be able to figure that out myself with the bits that are left over...

Good description Andrew...'graceful curve and functionality'.
 
Andrew, if you look closely at the back of the saw in the photo, you can see the other linkage in the lever back there. I don't have any other pics on the computer. If you need more, I will open a saw and take some......
 
  • Thread Starter Thread Starter
  • #10
Not just yet, let me try and get it all together first, once I get to a certain point then it becomes logical, and I might actually remember how I did it last time.
 
I have a pic of the back of the handle with the carb intact .One also of the "string trick " to get the boot back in the handle .

If I recall you have one hot wire on the front that connects with a quick link and a ground which has a large ring terminal that goes under one screw of the front mount .
 
  • Thread Starter Thread Starter
  • #12
That picture of the carb might be helpful...I've got the boot back in the handle already.
 
Ask and ye shall recieve.
 

Attachments

  • MS 200T handle 003.jpg
    MS 200T handle 003.jpg
    53.6 KB · Views: 51
  • MS 200T handle 004.jpg
    MS 200T handle 004.jpg
    47.1 KB · Views: 51
Say I should mention several things .First make certain the impulse line is firmly attatched under the handle .That pot licker can play tricks on you .

The wire for the throttle can be tricky .You about have to have it attached and slide the carb part way in then attach the choke wire while aligning the fuel line to the carb .My fat fingers won't fit too well with the throttle linkage .I have to snatch it with a pair of needle nose pliers .
 
  • Thread Starter Thread Starter
  • #17
Thanks Al, I was about to ask about the linkages...you read my mind. :)
 
The throttle is goofy .Just by looking at it you would not think it fits in the way it ultimently does .I've done a bunch of them and I still get messed up at times . The rascal has a tendency to fall out until the carb is fully back in place .Don't be surprised if it takes you sevaral goes before you get it .
 
  • Thread Starter Thread Starter
  • #19
Thanks, I've ordered a new check valve for the inside, I'm going to wait to put it back together, I'd hate to spend all the time and then find I really did need to replace that little rubber flap!

Get the 020 out of retirement for a run.
 
Just for curiosity I looked at the IPL in reference to the tank vent .Doesn't say much just tank vent .I only assume there to be a check valve of sorts and a filter type gizmo which I assume to be that thing on the top of the hose .It doesn't really say .

A good thing though it listed the size of the fuel cap o-ring which is M25 by 3.5 .I have an assortment but am always forgetting the exact size in case people ask .
 
  • Thread Starter Thread Starter
  • #21
The little rubber gizmo is on a different page in the IPL, I have the new vent fitted now, just hoping I can push the new gizmo in from the inside of the tank, I had to bang in a nipple where the spongy stuff used to be, then the short hose with the vent on top attaches to that.
I think it would be a bit difficult to get the nipple out again, they supply a little piece of brass tube to bang it in with. Took a while to decode the pictoral instructions, funny, it made more sense after I got the new one in than before...

Semi-retired 020 ran like a charm today.
 
About the linkages to the carb...
When you win the battle to put them back in place, don't try the throttle to see if it works well. Because the linkage will lean sideway and fall from the carb, and you have to put it back again.
Just place the air filter's mounting plate over the carb and secure it. There is a small bit of plastic under it, which maintains the side of the linkage.
 
  • Thread Starter Thread Starter
  • #23
Started the re-assemble this afternoon once the temperature climbed down from 91* (32ish)

Thanks for all the photos and tips...may I request one more?
I need a photo of the two electrical connections in the right places...can't figure it out from the IPL

FYI, if you ever have to fit a new orange rubber nipple thingy inside the fuel tank ( a check valve type thing) up into the lower portion of the tank vent...After disassembling sufficiently to access the tank vent, pull off the upper part of the vent, look down through the black plastic nipple, sight the orange rubber bit and poke it out with an old dental pick into the fuel tank...retrieve the bit, then thread a piece of waxed twine through the hole, pull it back and forth to lubricate the little hole, then just push the orange part in from inside the tank...mine plopped right in place, it was the wax on the twine that did it, a little lubrication was essential.
 
The earth wire connects from the AV mount to the strip of metal that runs up to the on off switch, you can pull the strip out to reconnect the earth, the live wire attaches slightly underneath, (the other side) of the AV mount.

Oh and always take take the on/off switch off before taking apart the rest of the handle.:)
 
  • Thread Starter Thread Starter
  • #25
Thanks but the strips are still attached to the wires and hanging out of the handle, can't quite figure out how/where the strips fit back in...call me a girl...wait...I AM! :)
 
Back
Top